Sunday, April 10, 2016

More Preliminary Tasks

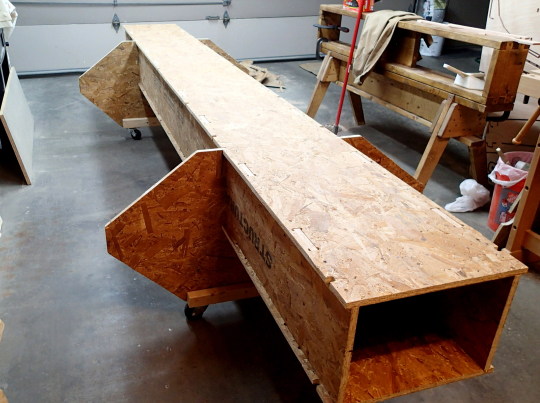
Though the construction of the strong-back was one of the first tasks, the use of it for setting up the station molds (which currently populate countless areas in the basement and garage) will not commence until all preliminary tasks are completed.

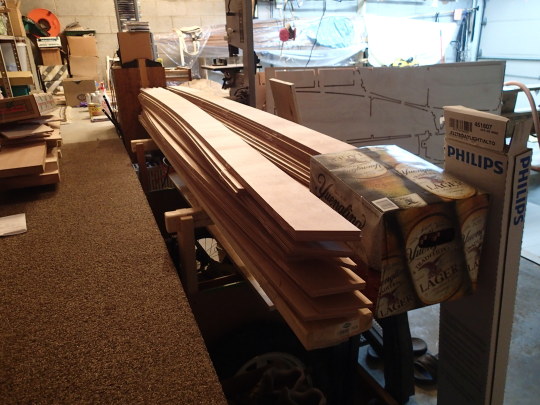
For one it is of course a basic matter of task sequencing but equally importantly, the strong-back provides a very convenient, long platform for the construction of items which are needed prior to the assembly of the jig. The most obvious one, of course, is the gluing up the long planks which will become the strakes of the hull once the station molds are set up.

Ilur has ten strakes on each side, so there are 40 separate plank halves that get cleaned up, glued together and verified for matching curvature.

The new puzzle joint just recently redesigned by Francois Vivier make the fine tuning of each plank quite a bit easier since there really is no wiggle room to permit an "unfair" curve.

The bottom five planks received a fiber glass patch for extra reinforcement.
These patches will be sanded smooth but even so, they will be facing inboard.

I still have a number of planks to glue and clean up. My space constraints limit me to gluing up one pair at a time.


Then as previously mentioned the center board trunk needs to be prefabricated.

The design is simple, functional and ingenious.

The CB simply slides into two grooves on either side of the CB trunk and a bronze pivot bolt comes to rest at the bottom at the pivot point.


For extra insurance, I lined the slot with some carbon fiber tape to protect from abrasion.


After epoxying the inside walls with fiber glass reinforcement, I fill coated the fiber glass with several layers of graphite... once again to protect from abrasion.

F. Vivier called for a 14mm rod to act as the CB pivot. This will be inserted at the pivot point in the center board.

Just to make sure that I had a proper fit before gluing the trunk shut for ever, I ordered a 5/8" rod to test for size.

I am glad I did because when it arrived I realized immediately that it was way too big.  The CB would have gotten wedged inside the trunk.

So I ordered a 1/2" bronze rod and filed one end smooth to prevent scratching and voilà this size fit as snug as a bug.

Once I am ready to build the center board I'll have to cut a piece down to the needed 1  5/8" length.


One other pre-assembly project concerns the transom which consists of three parts: an 18mm and a 9mm plywood component plus one which forms the top plank with rabbet and sculling notch to be cut out of timber. I was able to secure a nice piece of Sapele.

The timber must be extra strong since it will in part provide the backing for one of two gudgeons holding the transom mounted rudder. The other reason is that when you use the sculling notch the transom must be able to absorb significant lateral forces.

So far so good. Once I have finished the gluing and cleaning up of the remaining strakes, I think I'll be ready to assemble the station molds on the strong-back.

I am trying to be patient and not to rush the preliminary tasks because if something can be done on a flat surface it'll be a lot easier to do it while still 2-dimensional than when things start to get 3-D curvaceous.

Monday, March 14, 2016

Ilur - Beginning in Earnest

So... ta-taaa:  the kit arrived!

I had it shipped to a nearby warehouse from where a friend helped me with his pickup truck to transport all 750 lbs. to my garage.

The sheets of plywood arrived on a 4' x 8' wooden pallet.

Just bringing this package home and unloading it sheet by sheet proved to be quite an undertaking.

The first order of business was to inspect each sheet to make sure nothing had been damaged during transport.

Happily, all arrived in perfect order.


The ingenious and innovative aspect of the Francois Vivier boat kits is the fact that along with the plywood, you receive precisely cut AdvanTech boards with which you can assemble the strong-back and station forms.

Without a doubt, this saves the builder countless hours of preparation.

All the same, building an Ilur is a big project from my perspective and for my level of experience. (or lack thereof)


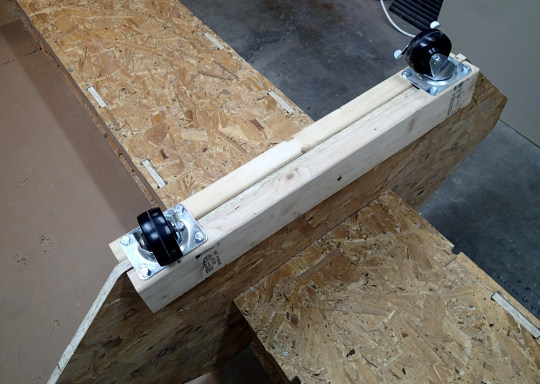
To begin with I needed to assemble the strong-back and add some wheels to the base so that I could move the evolving and heavy structure around as needed.

More immediately, I will be able to utilize the strong-back as a convenient platform for a number of preparatory tasks prior to setting up the station forms.

In reading through Vivier's plans I actually did not fully appreciate just how many steps of preparation are necessary.

The most immediate job is to find a good source for timber. This is proving to be trickier than I expected. If I lived in Washington State or Maine this would not be a problem but around here it is not so simple. Mars Lumber has a reasonable supply of domestic and exotic hard woods but when I drove up there with trailer in tow (in order to haul some long pieces) I struck out. I will probably have to schedule a trip to my friends at Chesapeake Light Craft in Annapolis who not only sell their boat kits and related supplies but also a great deal of generic marine lumber.

In the meantime, there is much preparatory work. The transom needs to be assembled and top piece carved.

The 40 strake pieces need to be glued together into a total of 20 full length planks - 10 for each side.

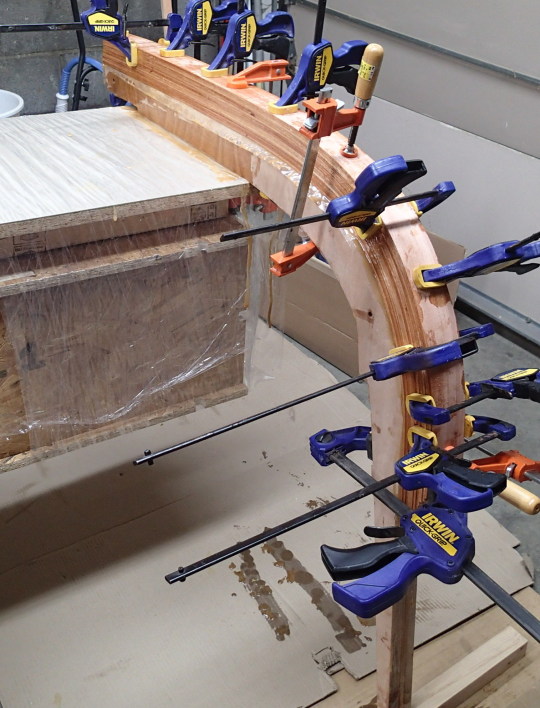
The bow stem needs to be assembled and the false stem laminated from 14 individual slats each 3mm thick and 50mm wide and about 4 foot long.


Pardon the mixed metrics... all of the instructions and measurements are in metric measurements.

Alas when shopping for wood I'll have to be able to translate into feet and inches.

Then the center-board trunk needs to be fabricated.

This task is quite involved and requires consulting a number of different pages of the plans in order to determine all of the specs. It is particularly critical to get this right since this will be the last and only time you'll be able to work on the inside of the trunk. It's got to be rock solid and able to withstand the stress of wave action and the wear and tear of the up and down sliding of the center-board.

More about that next...


Friday, February 19, 2016

Mustering Courage

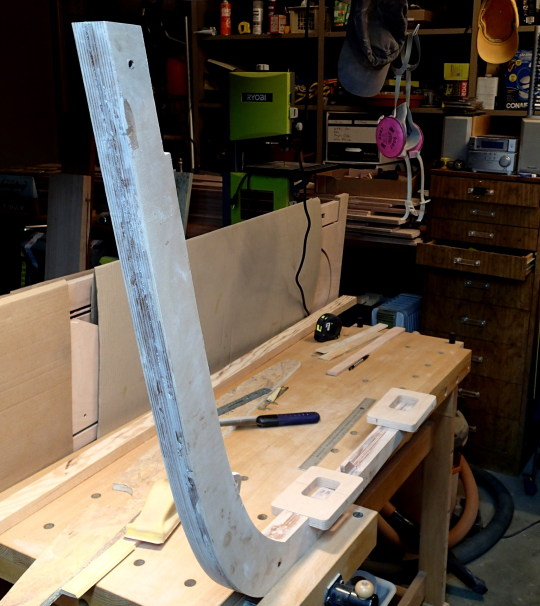
Ear of the Sternberg Chair
Okay, don't be alarmed by this picture. It continues to be a blog about Sailboat Building. For reasons which no longer make all that much sense, I had started a separate blog for my kayak building efforts. For now I'll keep it that way. 

So let me explain the connection between this picture and boat building. ~ Bear with me: this entry will be a bit wordy. Sorry!

I have not added to this blog in quite a while and the casual visitor might have surmised that with my Passagemaker Dinghy C-Lute sold (to a wonderful sailor in Atlanta), this might be the end of it.

Well, NO. To begin with, the reason I decided to part with C-Lute was my desire to build a new sailboat though I did not yet know what kind. With three wooden kayaks and one wooden sailboat (plus a modern racing dinghy) I really could not justify building another sailboat without first creating a "sailboat vacuum" to make space for a new build.

So, instead of another "winter building project" I allotted time this previous winter to researching what my next sailboat build might or should be. I knew that I wanted something heftier and bigger so long as I could still fit the construction process into my garage. It was not going to be a S&G (stitch & glue) boat like C-Lute because I hoped to try a different building method called glued lapstrake.

My criteria: I wanted a versatile boat, one that could be used for single-handed day-sailing, for the learn-to-sail program (where I volunteer as a certified instructor), for camping cruising the Chesapeake, for a comfortable romp in blustery conditions and for an easy transition to row when the winds die: essentially an open sail and oar boat with plenty of canvas to move on a wisp of air yet easy to reef or  dowse and a pleasure to row.  There are many boats by well-known designers to fit in this category. Space constraints eliminated many attractive options such as the wonderful Iain Oughtred designed double-enders like the Ness Yawl, Caledonia Yawl and Sooty Tern... all in the 19' range. 14 - 15 feet were probably going to be the maximum hull length over all.

Ilur - Lug / Sloop Rigged
After reading a number of boat building books (including Iain Oughtred's "Clinker Plywood Boatbuilding Manual") I did indeed resolved to build a clinker boat better known in US parlance as glued-lapstrake. In the days before the modern materials this construction method involved rivets and a very complex set of work processes not at the disposal of  someone without specific training. Nowadays lapstrake boats can be constructed using modern material (epoxy, fiber glass and marine plywood) to build a very traditional-looking hull at a fraction of the cost and time - not to mention without the essential and exquisite skills of an experienced ship-wright (to do a half-way decent job). Epoxy and marine plywood make boat construction readily accessible to a hobby-builder.

Countless building blogs and boat building sources (such as the Woodenboat Forum) were consulted as I clawed myself to a decision.

Actually, I was hoping to be found by a design rather then the other way around.

And then there was an article in the Wooden Boat Magazine (2015 Small Boat Edition) by Geoff Kerr (Two Daughter's Boatworks) about a boat called Ilur designed by French Naval Architect Francois Vivier that seriously piqued my interest. As it turned out, the builder of the reviewed Ilur (John Hartman) had an extensive and extremely informative thread on the Wooden Boat Forum where I could read blow-by-blow what was involved in building an Ilur.

I then downloaded a study plan on building an Ilur and came to grips with the realization that this was going to be A LOT MORE involved than any of my previous building projects BUT that even so, the unique design of this plywood clinker kit was thought-out so ingeniously that it would take a builder a lot less time than some of the other builds I had been looking at. Clearly it was going to be a lot more than a winter project. Obviously I looked at the other Vivier boat designs as well. In the end, Ilur seemed to best fit mon goût in terms of size, versatility, practical application, "provenance" and salty appearance.

The Plans for Ilur
The next step was to order the actual plans from Mr. Vivier who sent them promptly. I was extremely impressed with the extraordinary detail and clarity of the drawings. 

I must mention another valuable resource that helped to muster my courage to do this build, namely the Off Center Harbor video series, by Geoff Kerr on building a glued lapstrake Caledonia Yawl. I highly recommend this site to any lover of wooden boats regardless as to whether or not you want to build a boat yourself.

 In the lapstrake building video course, Geoff Kerr recommends to prospective boat builders that they build themselves a "Manning
Manning Bench - components separated
Bench" (or two) the construction of which is described in a book called The Workbench Book (The Taunton Press).

After waiting for the ordered book for over six months (presumably out of print) it finally arrived and I was able to construct one of these modular workbenches.The two components (1' hi and 2' hi respectively) can be used separately or clamped together as a single 3' hi bench.

In combination with my other workbench, I'll be able to create a long platform for the building of spars.
Manning Bench - components together


As I learned more I became somewhat intimidated by the prospect and concluded that I first needed to acquire some experience in working with hard wood. This was clearly a needed skill and it required tools I had never owned or used before. Obviously, even the best tools are useless if you don't have the skill and experience to properly use them.

Last spring I had been in Germany after my mother passed away. Essentially this set back any considerations of commencing the project by many months. Furthermore a major software upgrade project at work was going to require all of my undivided attention for six months or more. So while these two matters caused a significant delay, it gave me time to ponder my plans and consider my angle of attack - from afar.

Burg Sternberg
My parents had inherited an unique chair, a good number of which had been build for my grandfather according to his design and specifications. My grandfather (a pioneer in Early Music) had established an instrument workshop and museum of rare historical instruments on Burg Sternberg where he offered seminars as well as workshops in construction and performance of Renaissance instruments. In the early 60's Burg Sternberg became well-known to Early Music lovers and was recognized for the extraordinary acoustical properties of the Rittersaal.  (see my blog entry So That's Why) This is the hall for which these chairs were intended and where I first sat on one.

Anyway, this arm chair had a straight and austere form but its shape struck me almost as a throne of sorts on account of its generous width and the unique scrolled ears invoking the look of an early musical instrument . This Sternberg Stuhl (as I began to call it) was surprisingly generous and comfortable almost luxurious - a perfect listening and thinking chair. I would have loved to take it with me across the ocean but that was not exactly practical. However I took lots of pictures and precise measurements. So now, as I had resolved to acquire some experience with hardwood, this particular design offered itself as an attractive and to-me meaningful opportunity.

I consulted with my dear friend Garth Jones (who is a professional builder of exquisite custom-designed furniture as well as a boat builder) regarding the optimum wood of choice: it was determined to be Cherry.

One of these chairs will soon go to a new home
Before trying my hand (and tools) on Cherry I wanted to make sure that I had not gotten confused with the (metric) dimensions. Therefore I picked up some construction lumber and fashioned a somewhat crude version of the chair simply to make sure that the dimensions "felt right". They did and off I went to buy enough fine Cherry for two Sternberg chairs... just figuring out what and how much I needed without unnecessary waste was a new skill.

The chairs have been finished off with several silky coats of Danish Oil and now have that wonderful variegated Cherry glow which over time will darken. With the support of and guidance by Garth Jones, I learned quite a bit about working with hard wood and am now "pronounced to be  ready - for the most part" to commence Ilur.

The kit has been ordered and cut by Hewes & Co.
In fact, it is being shipped as I write this.

Ah - anticipation is such a sweet thing!

Monday, July 13, 2015

Ready to Let Her Go - SOLD

C-Lute has been SOLD!

With a tear in my eye I am ready to let my Passagemaker Dinghy go. Besides the PMD, I have built three kayaks (a Night Heron Hybrid, a Shearwater Sport Hybrid and a fully stripped Petrel). Now I am contemplating my next build, another sailboat - another lap-strake hull.

Alas, in order to build my next boat, I am forced to make some room in my residential boat yard and thus I have decided to make C-Lute available for sale. This dinghy has everything your heart desires and she is in tip-top shape. She can move on a wisp of air yet can take 15 - 20 knots without a problem.

Included are the following:
  • One Passagemaker Dinghy (painted in Hatteras White lower strakes and bright upper strake)
  • The bright work is protected by interlux schooner varnish - with top coats of satin varnish
  • 2 stations of bronze oar locks
  • 8' spoon blade oars
  • stitched on leather on oars, boom and yard
  • Tan-bark Lug Sail (upgrade) with reef points
  • sail and spar bag
  • hi-end Ronstan Carbon Blocks on down-haul
  • hi-end Ronstan Carbon Blocks and cam cleat on mainsheet
  • Mahogany carved tiller extension
  • Trailex trailer with special bow fitting for pram
  • Spare tire 
  • "travel kit" a customized setup which allows you to trailer mast, spars, oars and dagger board safely and securely

Asking $3,500 (essentially a little less than the direct material costs)

Boat located in Pittsburgh, PA
If interested, communicate via email cmharlan@ruach.net

So, how - you may ask - can you stand it... letting go of my baby? My answer: that's how any builder of fine musical instruments must feel... and yet - there is comfort in letting someone else enjoy the fruits of your labor.

Here are some current pictures:


Thursday, December 29, 2011

A Sunny Fall Outing

As winter is upon us and flurries fill Pennsylvania skies, my heart was warmed by a recent email from my friend Paul whose sailing companion had captured some pictures of my little C-Lute having a sunny fall adventure.

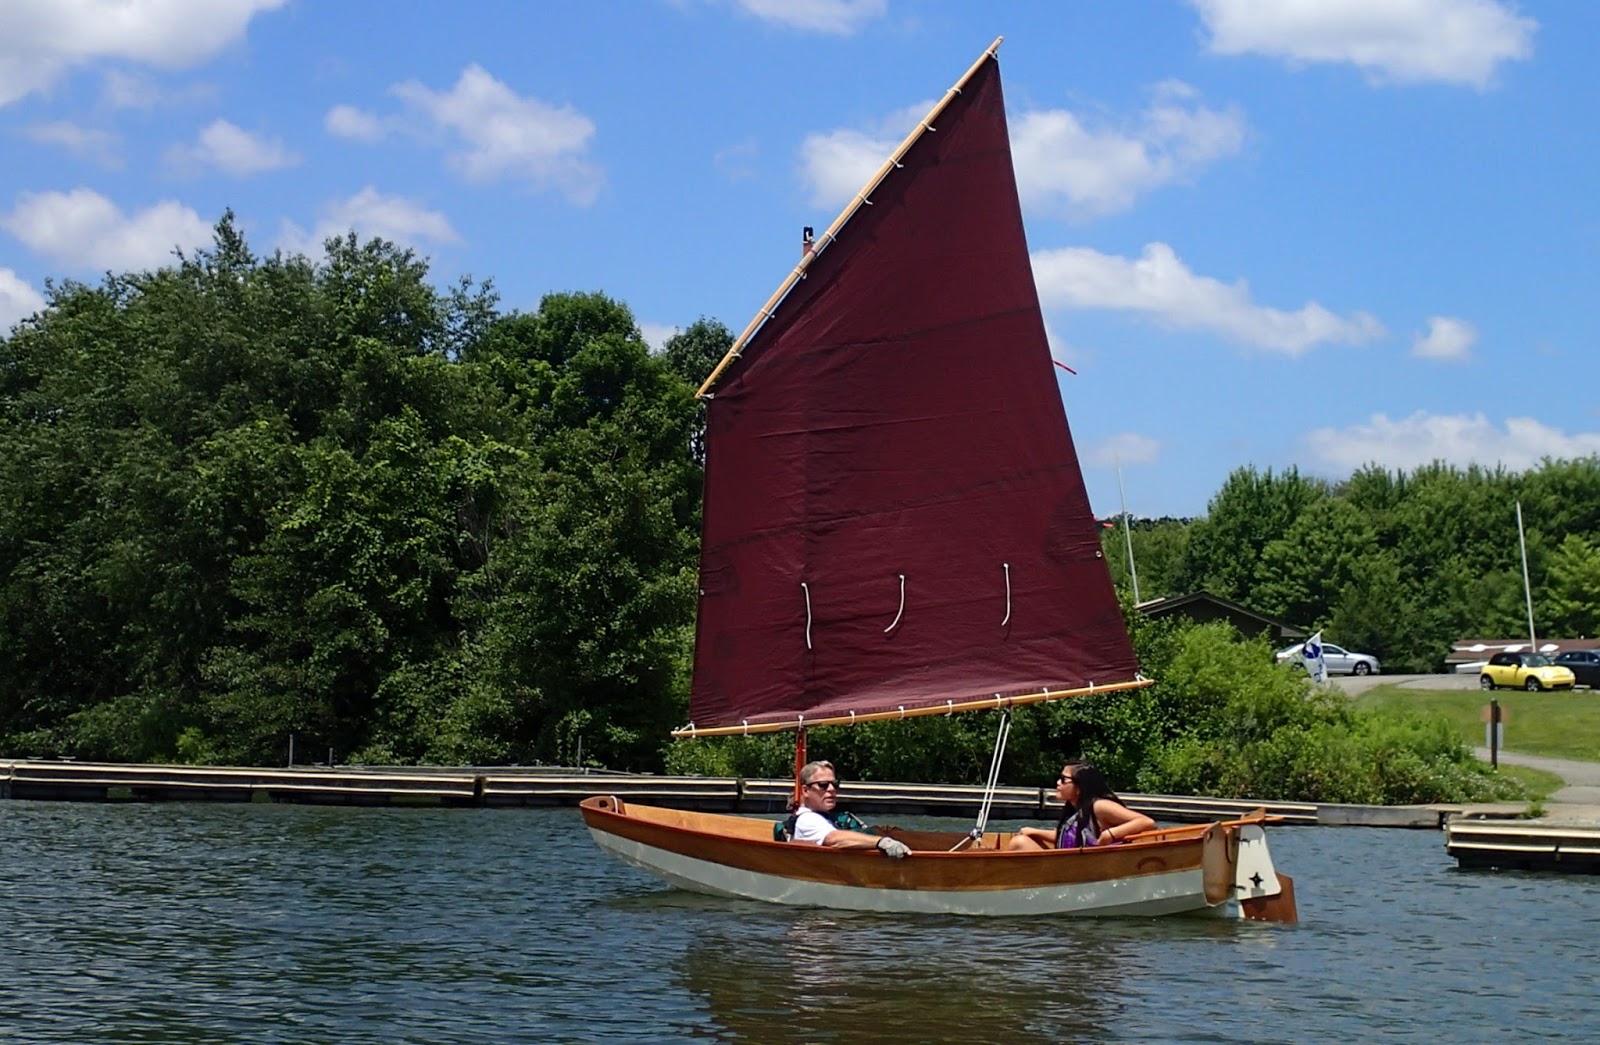
Here she is, ready to catch the breeze...

...moving right along.

Even though I want to sail C-Lute most of the time, I always want to take the oars along because I love to snuggle up into little coves and inlets where the water gets thin, the air bends light and squirrely and bird-watching becomes fascinating.


I figured out a convenient way to store the oars out of the way whilst sailing. 

You'll notice that the oar locks are sitting in the front rowing station (sockets). They are folded one blade on top of the other at the bow and rest on the forward transom where they are secured with a bungee. This arrangement works very well while sailing. You can sit anywhere in the boat without the oars getting in the way.

This method works very well with the balanced lug. The mast does not have any shrouds or forestay and it is easy to drop the canvas and roll up together with yard and boom.

You could then row immediately. However, I also like to lift the mast out and lay it so that the top end of it is secured at the bow with the self-same bungee.

It is possible to lay mast on one side and the sail, boom and yard on the other in such a way that they do not interfere with rowing.

The gunter rig would obviously preclude such maneuver while at sea.

Sunday, October 30, 2011

An Autumn Outing


An Autumn Post Card from Moraine State Park:


On Oct 30 the forecast called for temps in the upper 40's. Well, truth be told - and I was there for first-hand reporting - the mercury never reached 40F.  However, the fog caused by cold air above much warmer water, created an eerie almost spooky atmosphere.

Though many leaves were still tenaciously hanging on - the end of fall snapped through my bones.. My feet froze but I loved being there - especially aboard C-Lute.

Obviously, had I expected 30's, I could have brought another layer...  But then again, had I expected 30's I most probably would not have gone to Moraine for the sail in the first place and...

...would have missed a magical Moraine moment.


I never thought of the rowing option quite in this way but when I got too cold, I dropped the sail for a  while and rowed... for sure the physical exercise warmed me up and before too long, I was ready to hoist the lug rig once more.

Saturday, July 30, 2011

What's next?

That's right.

What to do after you have finished a boat project?

Even as I awaited the overdue arrival of my Passage Maker kit from CLC late last year, I found myself continuing to peruse the catalog of beautiful other boat designs available from Chesapeake Light Craft.

Have I been bitten by the boat-building bug? You bet!

So when I attended the CLC-sponsored OkoumeFest this past spring, one of my main objectives was to take a look at various kayak options, try them out and determine what my next winter project would be.

I was looking for a project that would build on my stitch and glue experience yet set a few new challenges. The various hybrid options in the kayak designs seemed to be an excellent step up since the strip-planking of the deck is a more intricate building technique.

Paul Plowright's winning Shearwater 17
I had already set my eyes on the 17' hybrid version of the Shearwater design. The kayak has great lines and looks fabulous. It also seem to offer the right mix of stability and performance that I thought would be best for me.

In fact, upon arrival at the OkoumeFest, various builders had brought their hybrid Shearwaters and I was just floored by the beautiful, personal designs.

Several test paddles on Shearwaters reinforced that this was a superb craft that was great fun to paddle and would suit me well.

Testing the Petrel
Dan Thaler's kayak:  Best in Show
I tested a variety of other extremely elegant designs including the 17' Petrel.


What a powerful kayak?!

I was pretty much set on the Shearwater. But then something unexpected happened. I sat in a very narrow and long boat called Night Heron, designed by Nick Schade (who actually designed many of the kayaks that are available as kits through CLC.)

At any rate, at 18 feet of length and with a mere 20" beam, this boat offers an altogether different paddle experience. When I first got into the snug cockpit I was a bit nervous because I thought that this design would simply be too demanding for me.

Click here for slide show of the CLC Night Heron.

After a couple of laps I became more confident and comfortable with the feel and control of the boat. Paddling this sleek, powerful machine was a total thrill! What can I say? I was smitten! Big Time. Sitting in this boat reminded me of the time when I was shopping for a new concert guitar (a classical guitar) and I played the instrument (made by Nicholas Ioannou) where - as soon as I played the first few chords - I knew that THIS WAS IT.

I did switch back and forth between the Shearwater and the Night Heron several more times and my initial infatuation with the Night Heron was reinforced with each test ride.

Detail of the wood grain at transition from loom to blade
I ordered the hybrid Night Heron kit. It arrived recently. I'll probably start in October if I can bear to wait that long. For now I have been reading up on strip-planking kayaks (Nick Schade has written two books on the subject) as well as the instruction booklet.

Then there is the important task of drawing up a deck design. I suspect that I will be able to do a better job once I have a full understanding of all the implications in construction of any particular design. I have three different types of cedar strips to work with - light, medium and dark.

The tip of my paddle is reinforced with a mix of epoxy and wood-flour
In the meantime I have been priming the wood-working pump by building a Greenland paddle.


I found a fabulous 2 by 4 of immaculate Western Red Cedar at a nearby lumber shop. Amazing stuff!


Eric Schade Demonstration at CLC
The inspiration to building this type of paddle came from one of the workshops offered at the above-mentioned OkoumeFest.

Nick Schade's brother Eric gave a demonstration.

In addition, very detailed information on making such a paddle is available online.


If you start with good wood, the paddle becomes an elegant thing of beauty.

Paddling with the Greenland paddle feels very different from the modern power paddles.


It'll be fun to learn using it to best advantage.

I'll be reporting on building the Night Heron on my new blog.